Keep flammable items away from the stove.
Never leave melting wax unattended and never use direct heat to
melt it. If the wax catches fire, do NOT try to douse it with
water—use a fire extinguisher, baking soda, or, for a fire
contained in a pot, cover it with the pot lid.
Prepare
workspace
Prepare your workspace by covering it with wax paper or newspaper to make cleanup easier.
Heat
wax
Place the wax into the double boiler setup and heat to between 150 and 200 degrees, depending on manufacturers instructions. Use the thermometer to check the temperature frequently. Dont let it exceed 250 degrees or the vapors could become flammable.
One pound of wax will make about 5 small votive
candles.
Affix
wick
Affix the metal tab of a new wick to the bottom of each container using a dab of melted wax. Make sure the wick is centered and standing up straight.
Don’t use wick putty for votive candles—it
makes the finished candles very difficult to remove from the molds.
Stir
wax
When the wax has reached its proper temperature and is fully melted, remove it from the heat, turn off the stove, and stir.
If you want to add color or fragrance, mix
in the additives according to the package directions just before
removing the wax from the heat.
Pour
wax
Pour wax into each mold until its half an inch below the rim, saving about a cup of wax for later use.
Let
cool
Put the molds aside to cool, keeping them away from any drafts or flammable objects. And dont refrigerate themthe wax should cool slowly.
Poke
holes
Once the top has cooled and a skin has formed, usually about 30 minutes to an hour later, use a toothpick to poke a few deep holes near each wick to help prevent air pockets from forming.
Add
wax
As the temperature drops, the wax at the center of the candle tends to sink and form a well. Reheat the wax you saved and add it to the mold until the well is filled.
You may need to do this several times, but
only fill the well, don’t over-pour. If fresh wax seeps
down the sides of the mold, the candle will be harder to remove
later.
Slide
candle out
After the candles have sat for several hours and cooled completely, turn the molds over and tap the bottoms until the candles slide free. If you used paper cup molds, simply peel them away.
Trim
wicks
Trim the wicks to about a quarter of an inch and thats ityour votives are ready for action.
 Prepare
workspace
Prepare
workspace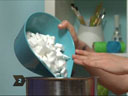 Heat
wax
Heat
wax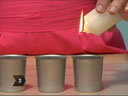 Affix
wick
Affix
wick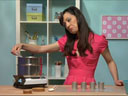 Stir
wax
Stir
wax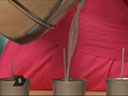 Pour
wax
Pour
wax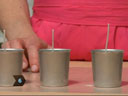 Let
cool
Let
cool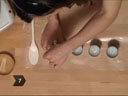 Poke
holes
Poke
holes Add
wax
Add
wax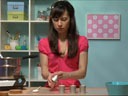 Slide
candle out
Slide
candle out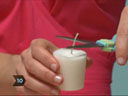 Trim
wicks
Trim
wicks