Tie
slipknot & cast
Tie a slipknot, leaving an 8-inch tail of yarn after it, and cast on 24 stitches.
Knit 15 rows
Knit 15 rows of two-by-two rib stitch knitting two stitches, purling two stitches, etc.
Using a row counter makes it easier to keep
track of how many rows you’ve finished.
Knit
12 rows
Knit 12 rows in stockinette stitch alternating between a knit row, then a purl row, etc. You should be ending on a purl row.
Knit
4 rows
Knit 4 rows in rib stitch again.
Cast
off & tie
Cast off and cut the yarn, again leaving an 8-inch tail. Tie a knot in the tail.
To keep the wrist opening stretchy enough
to get your hand through, be sure to cast off in rib stitch.
Fold
in half
Fold the piece in half so that the knitted sidethe side covered in little Vsis on the inside and the edges are lined up.
Sew
top edges
Starting at the top, finger-end of the glove (where there are 4 rows of rib stitching), use a yarn needle and the knotted tail of yarn to sew about 2 inches of the edges together. Cut off the yarn, leaving a shorter tail of about 2 inchesbut dont knot it.
Sew
bottom edges
Starting at the bottom, wrist-end of the glove (where there are 15 rows of rib stitching), use the yarn needle and the other knotted tail of yarn to sew about 3 inches of the edges together. You should be left with a holefor the thumb openingin the middle your sewn edge.
Try
on glove
Put your hand in the glove with your thumb sticking out of the hole. If it needs to be bigger, take out a stitch or two until it fits. If it needs to be smaller, make another stitch or two. Now finish off the two sewn endsknot the yarn, cut off the excess, and weave in your loose ends.
Repeat process
Turn the glove inside out andtah-dah!youve just finished half your pair. Repeat the entire process for a second glove, or just rock one for that vintage 80s look.
 Tie
slipknot & cast
Tie
slipknot & cast Knit 15 rows
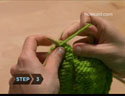 Knit
12 rows
Knit
12 rows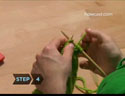 Knit
4 rows
Knit
4 rows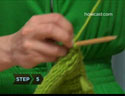 Cast
off & tie
Cast
off & tie Fold
in half
Fold
in half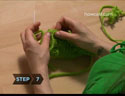 Sew
top edges
Sew
top edges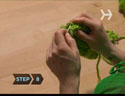 Sew
bottom edges
Sew
bottom edges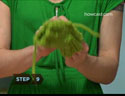 Try
on glove
Try
on glove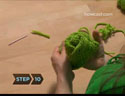 Repeat process